
The Space:
The covered pavilion: where the most time and energy was spent
on converting this space to party standards:
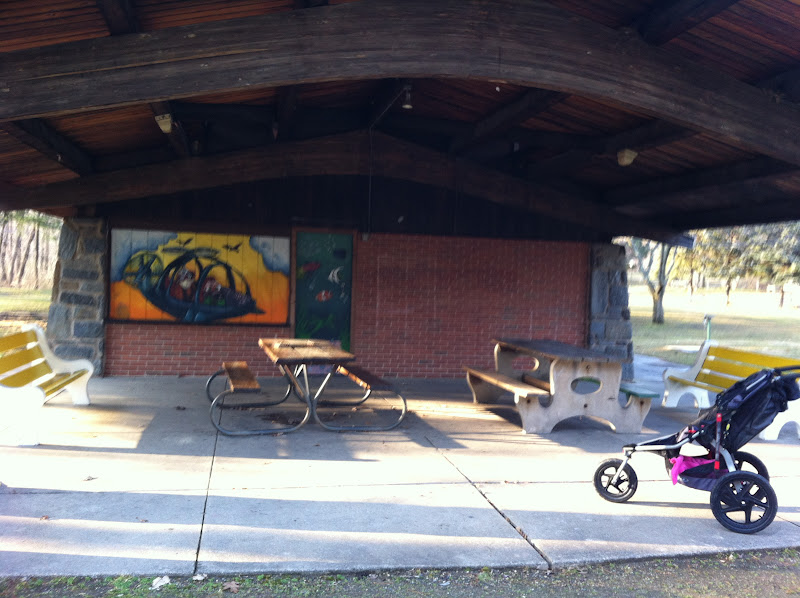 | ||||||||
| (photo taken on one of our runs, hence the Bob stroller) |
 |
| The tree for hanging the tissue poms! |


There was a mural on one of the walls that I knew I had to cover because it didn't go with the decor and I wanted to hang her photo banner on this wall. I found a pink flat sheet at a consignment shop for $2 in the perfect size. I hung it with clear thumbtacks. The pink was the perfect backdrop for the photo banner I made. I bought white printed card stock at Michaels (60 cents each) and cut it in half. I used rubber cement to attach the monthly photos to the paper. I then punched holes in each corner and looped pink ribbon through the holes to create the banner. I tied the ribbon at the ends into bows and attached with pink thumbtacks (yes, I was prepared with every small detail!). The opposite wall was brick and I considered covering this wall, as well, but because I didn't have a matching pink sheet I didn't want the walls to look too mismatched. On this wall I hung Ellie's birthday banner, which was handmade by two friends in our playgroup, and have their own Etsy shop called R&R Creations. I was in love with the banner! It matched Ellie's color theme and was very whimsical. Check them out here and think of them for your next party! In between these two walls was an additional door with a mural, in which I added a balloon bunch (in, of course, pink, yellow, and green).


The picnic tables were covered with the inexpensive yellow plastic tablecloths ($1) with a pink blooming flower pot placed in the center (Trader Joes, $5 each). Extra chairs were brought in for additional seating. We also brought in 3 tables- one for food, one for gifts, and another for dessert and favors, and white tablecloths. On the dessert table I placed her invitation in a white frame, the favors in a green basket, and the flower cookies and cake pops on clear plastic "china" ($1 each). I made the cake pops the night before using a no-bake recipe. A very easy one, too. I froze the dough and when they were hard enough I melted the chocolate (white & pink) and topped with different color sprinkles. They were so pretty and delicious. A hit! I ordered the very popular striped straws from Shop Sweet Lulu and cut the ends to use in place of the lollipop sticks. They added a colorful aspect to the cake pops. From this shop I also ordered yellow polka dot candy cups to fill with goldfish (see photo above).

The recipe recommended using a foam block to hold (and dry) the finished cake pops. I used Ellie's drying rack to hold the pops. I couldn't recommend a better way to go. The straws fit perfectly into a blade of (fake) grass.
 | |
Dollar Tree Finds:
Who knew the $1 store would have so many great party items?!
 |
| Our dessert plates |
 |
| Watering cans used as favors |
 |
| Fancy plastic china (great selection!) |
 | |
| Tablecloths and other party supplies in a variety of colors |
The party planning was very time consuming. It was one of my top priorities for weeks before the party date. But, nonetheless, I enjoyed every minute! I had detailed lists in my "notes" section on my iPhone (everything from what I needed to buy and where, the decor, food, etc) pinned photos on Pinterest for inspiration, party outfit options, and designated family and friends to help where needed. Because the party wasn't at our home I felt the added pressure of making sure I didn't forget anything! I packed everything in totes (to make transporting as easy as possible), as well as extras like a staple gun and extra staples (we used this to staple the tablecloth to the table), push pins, tape, scissors, ribbon. I must give a shout out to my friend, Abby, who came early (2 hours early) to help me hang the tissue poms and decorate the space. I would not have gotten everything done without her help. Seriously. Best friend ever! My sister, Mia, also showed up before the party started to help out. And my in-laws were there bright and early to bring tables and coolers.
Here are a few photos I snapped while packing up the car:


Oh, and because it was an outdoor party (and I did not add a rain date on the invite) my husband and I stalked the weather app on our iPhones. We could not have asked for a more beautiful day!
This was what we got (party time 12-3):

A beautiful day for our daughter's 1st birthday party. I hope you enjoyed reading all about the party details. Check back soon for our professional photos!
No comments:
Post a Comment